Unified Cloud Storage Management System
Orchestrate multiple storage solutions with intelligent metadata extraction and semantic search
Key Features
Multi-Cloud Storage
Seamlessly connect and manage AWS S3, local filesystem, SQLite, PostgreSQL and more through one interface
Semantic Search
Automatically extract metadata from files and enable powerful semantic search capabilities, including tag-based filtering
Dynamic Resources
Monitor external links (like YouTube) for changes and update metadata automatically. Rescan files on demand through web or CLI
Advanced Controls
Built-in versioning, collision detection, and deduplication for robust data management
Extendible system
Bring your own META extractors, based on instructions here
Microservice Architecture
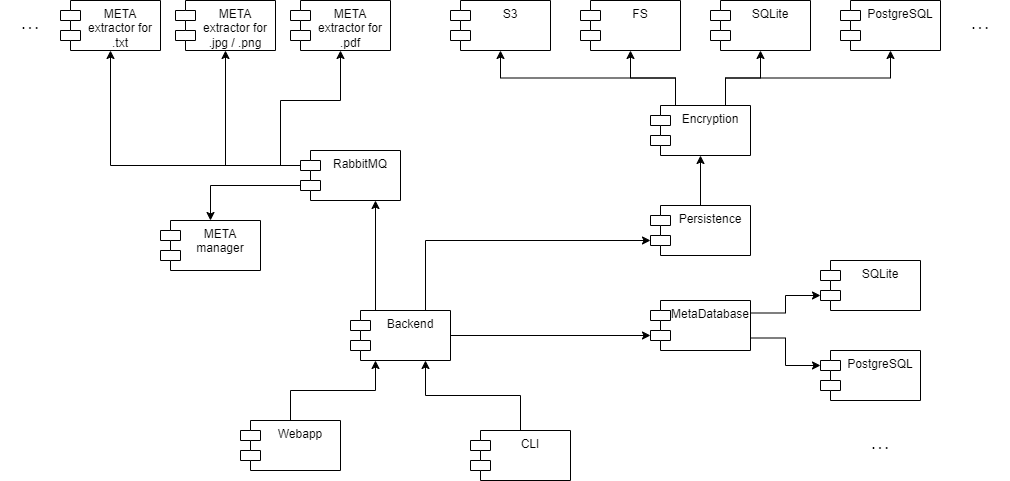
Modular Design
Swap internal components like databases, storage backends and metadata extractors with minimal configuration
Docker Deployment
All-in-one Docker image for quick local or cloud deployment
RabbitMQ Communication
Reliable microservice communication through RabbitMQ message queues for resilience and scalability
Zero-Downtime Scaling
Add new metadata extractors and services dynamically without disrupting the running system
Pluggable Storage
Support for multiple storage providers that can be mixed and matched
Metadata Pipeline
Extensible extraction system that analyzes files and external resources. Connect your own custom meta extractors through RabbitMQ
Deployment
1. System Requirements
- Platform: Linux (Ubuntu recommended), macOS, or Windows with WSL
- Memory: Minimum 4GB RAM (8GB recommended)
- Dependencies: Docker, Python 3.8+
- Storage: 15GB for core system + storage requirements
2. Clone the repository
git clone https://github.com/xlukacs/omnivaultx.git
3. Run the core system
Run the start script to setup the core system../start_image.sh4. Install CLI tool
As the CLI tool is distributed via a DEB package, you will need to install it manually:sudo dpkg -i om_[version]_amd64.deb5. Connect from the CLI
Set the API url and authenticate:om --setapi [url:port]om --authenticate6. Connect meta extractors
Download the meta extractors from the /extractors folder on github and connect them:python -m venv venvsource venv/bin/activatepip install -r requirements.txtpython main.pyOptional: Access the web interface
The web interface is only available in omnivaultx-core and omnivaultx docker images.
The official omnivaultx deployed app is not yet available, when ready it will be available at app.omnivaultx.com.CLI Usage
Initialize & Configure
Set the API url.
The system can be configured to use multiple systems, for example a local system and a remote system.om --setapi [url:port]Authenticate
Authenticate with the system.
Authentication is done via a token flow. Authentication is only necessary for online systems.om --authenticateTest connection
Test the connection to the system.
om --testHelp command
Get help about the CLI.
om --helpScreenshots
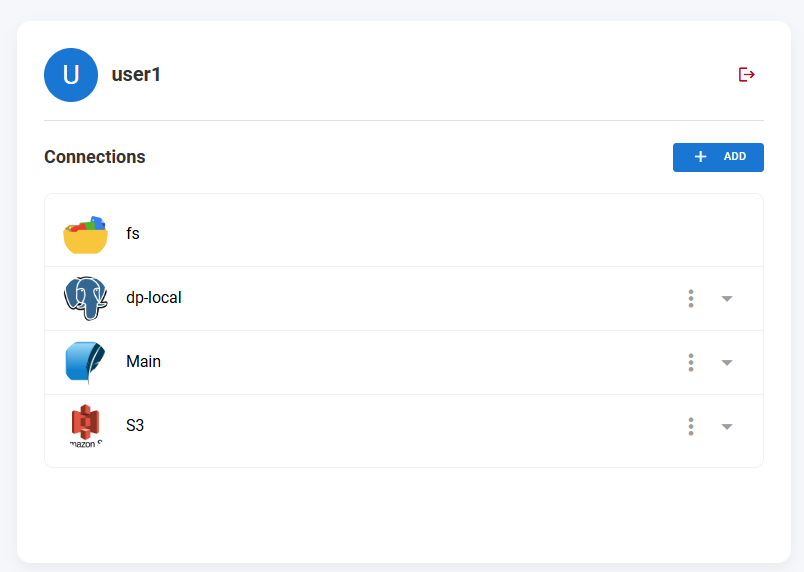
Connection dashboard
The connection dashboard shows the current user, the already defined connections and an option to add a new one.
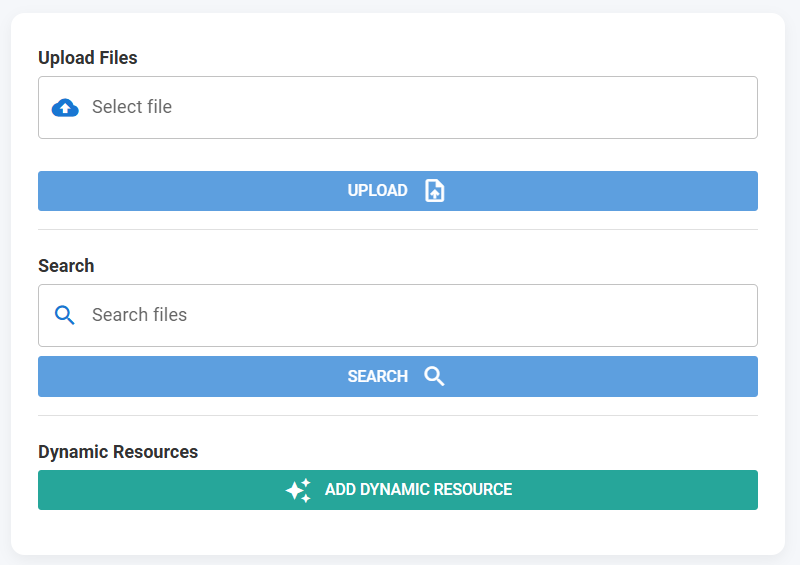
Resource input and search
The resource input and search feature allows you to search for resources by name or tag. Support boolean search.
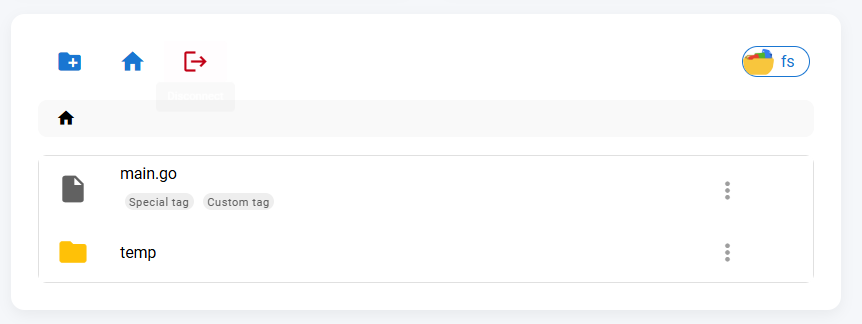
File explorer
The file explorer shows the current directory and the resources in it. You can navigate through the directory structure and select a resource to view its details. Tag management is also available here.
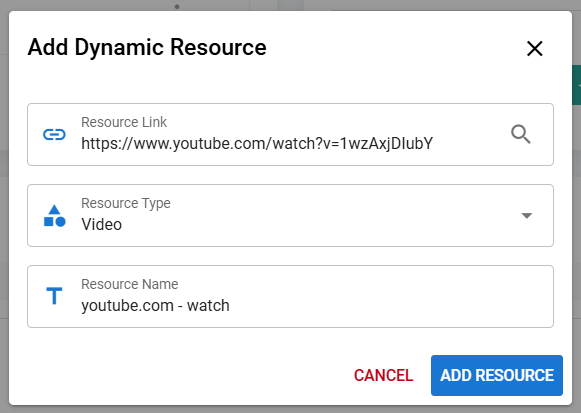
Dynamic resource scanner
The dynamic resource scanner allows you to enter an URL and do a dynamic scan. The returned resource type will be automatically selected, you just need to name the resource.
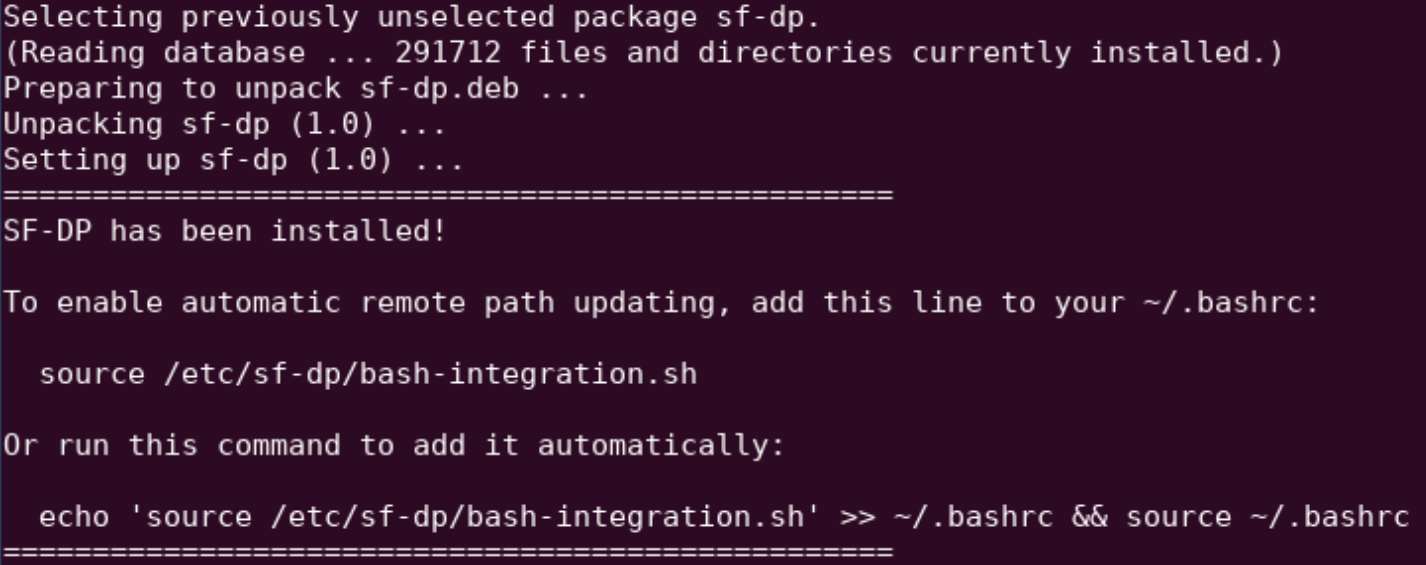
CLI installation
The CLI can be installed via dpkg. It will be installed in the /etc/om directory, optionally you can add a provided shell script to your PATH to see what is the connected remote directory.
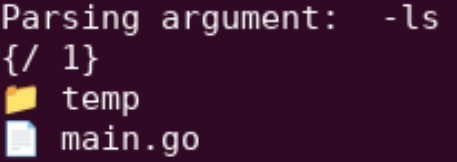
CLI command examples
The CLI supports many commands. Here is an example of the list command.
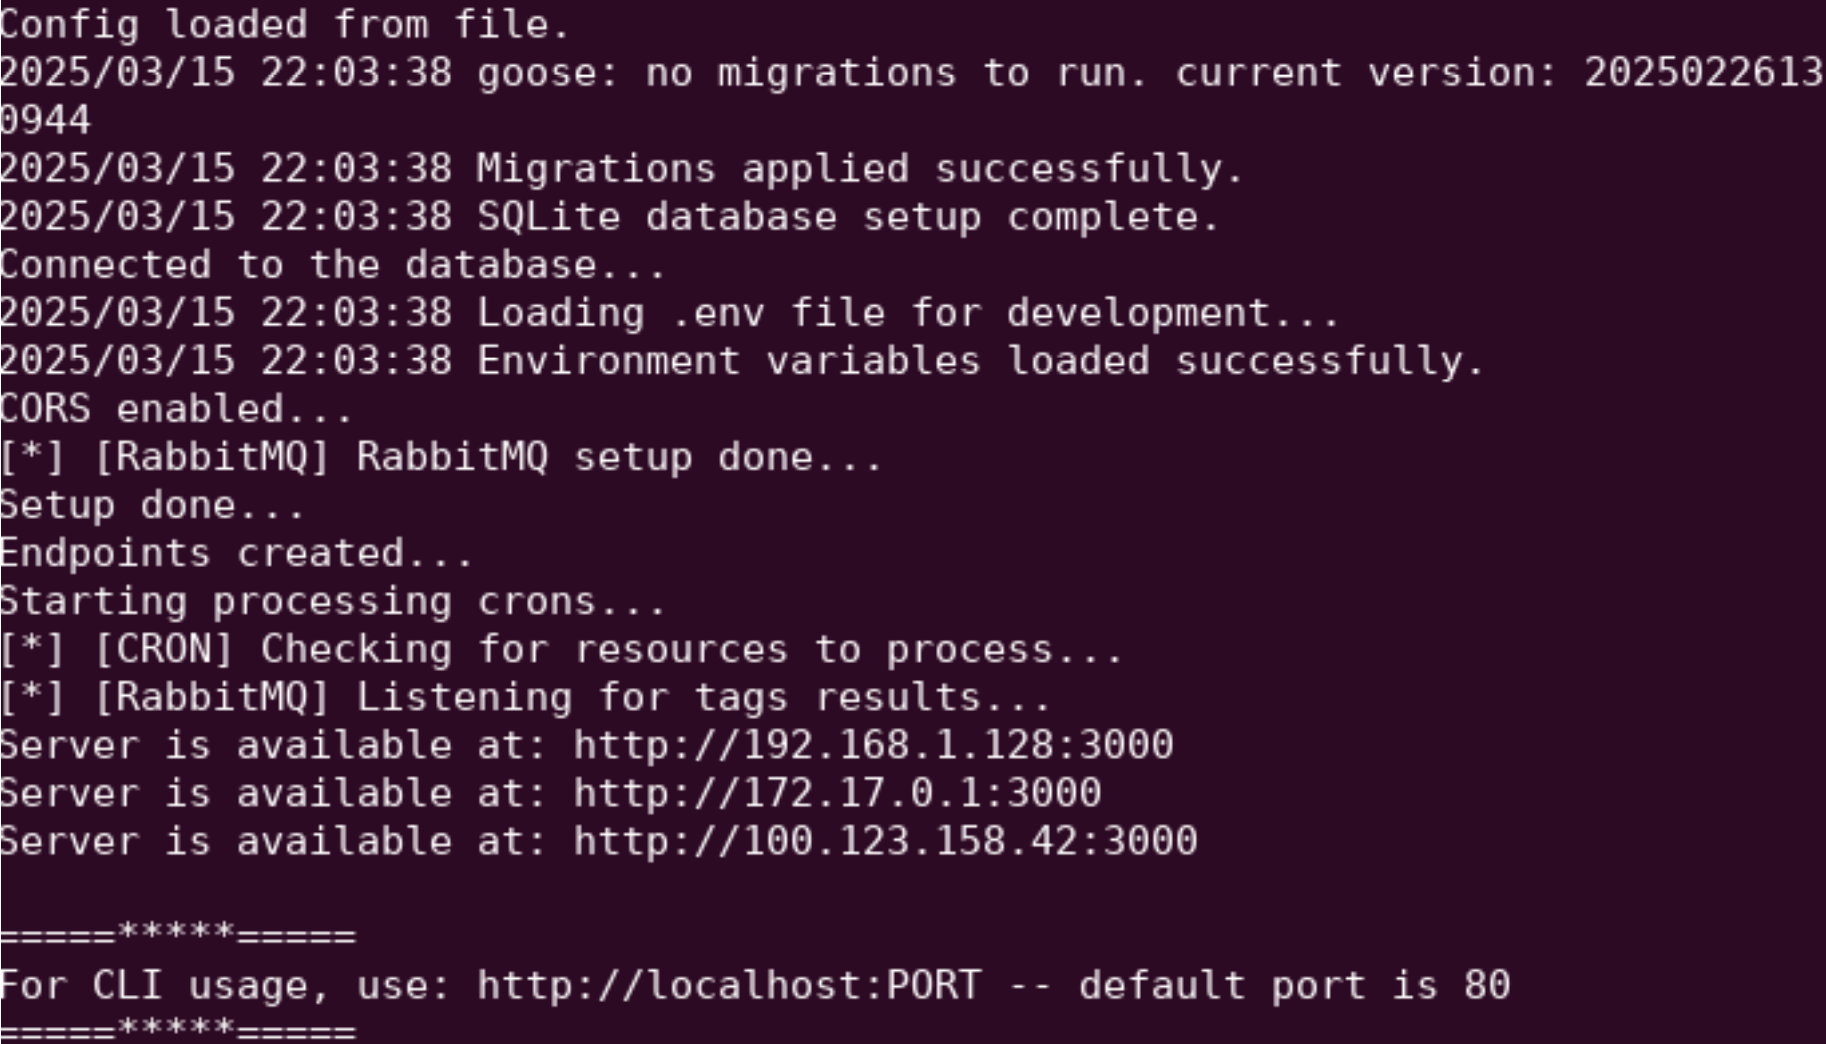
Core system local startup
These are the logs of the core system, while starting up. The system will log all the IP addresses it is listening on.
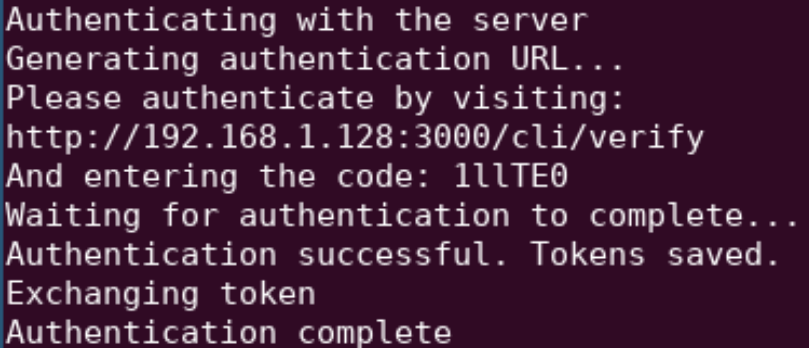
CLI authentication
The CLI supports authentication via token flow. Enter the provided url and after typing the token enter your credentials.
Contact Me
Get in Touch
Interested in implementing my research or discussing potential applications? Feel free to reach out.